Oops, I deleted AZUREADSSOACC – What now – How to fix

Accidents happen, we are only human and sometimes we accidently delete something that we shouldnt have. In most cases its no big deal, we can restore wlEmoticon-thumbsup.png. When it comes to Active Directory, it actually can be an issue. AD restores can be a nightmare (in my humble oppinion, anyways).

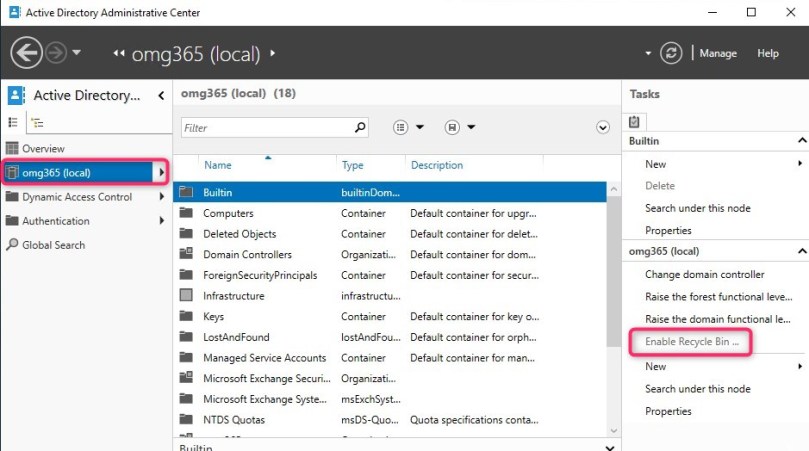
On a quick sidenote, enable AD recycle Bin, it can really save you some time.

Open Active Directory Administrative Center

2019-10-08_10h48_48

2019-10-08_10h50_05

After enabling it, you can’t disable it (but why would you?)

BUT, in this case we “act” like, we havent enabled it wlEmoticon-smile.png

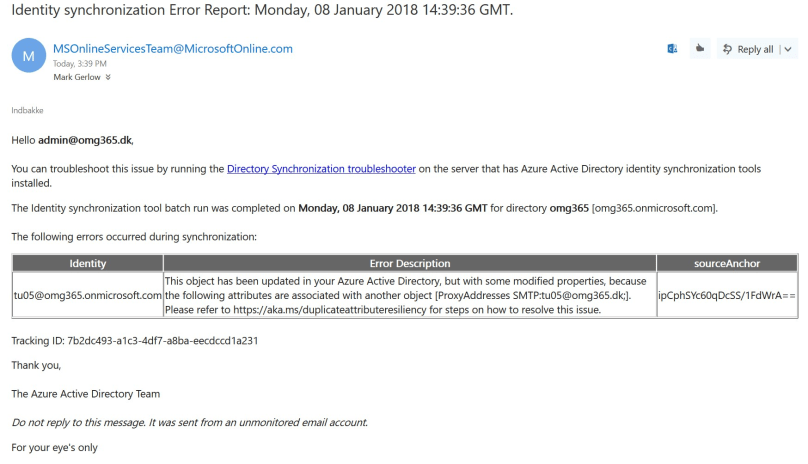
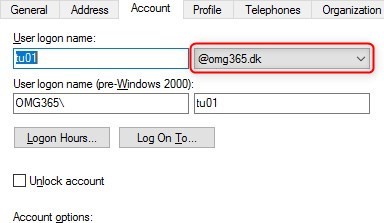
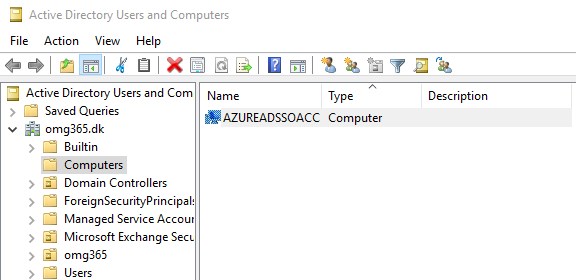
So somebody accidently deleted the AZUREADSSOACC computer account . This is the “virtual” computer account, used with Azure AADConnect when you enable SSO. (You can read more about it in a previous articel HERE.

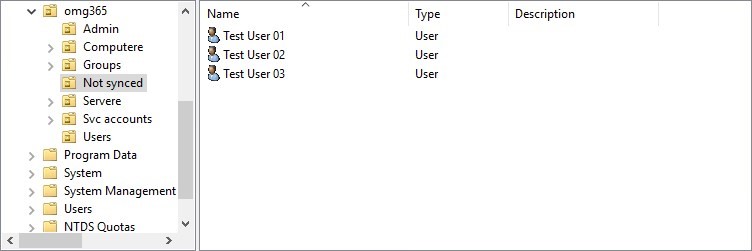
Normally its placed In the Computers container2019-10-08_11h12_28

But, in this case we deleted it ( And just to prove to you, that I’m not cheating smiley disappointed)

2019-10-08_11h13_55

It’s gonewlEmoticon-sleepysmile.png


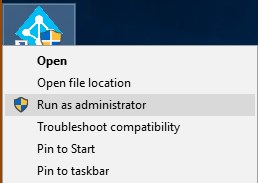
First you need to log on the computer on which you have AADConnect running.

Right click, and choose run as Admin (If you have UAC enabled, click yes wlEmoticon-smile.png ) on the “Azure AD Connect” icon, placed, must likly on your desktop (Thats default)

2019-10-08_11h16_12

2019-10-08_11h17_39

Click “Configure”

2019-10-08_11h18_35

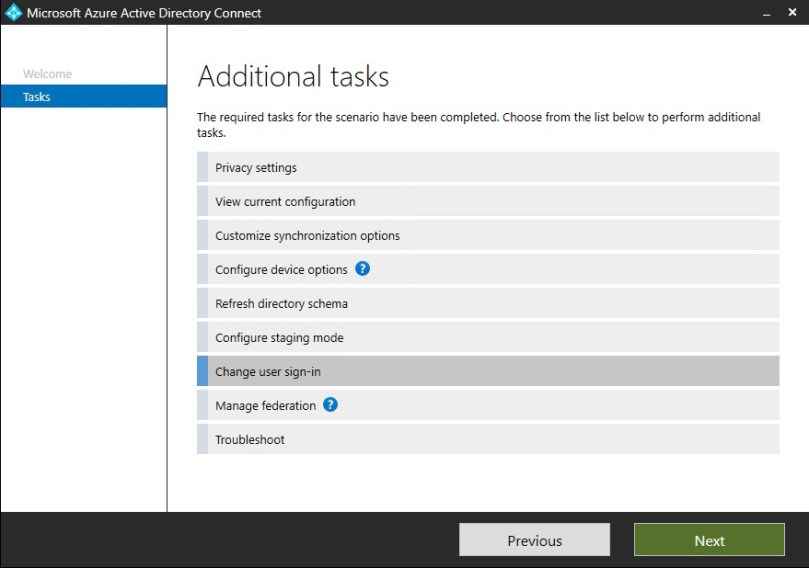
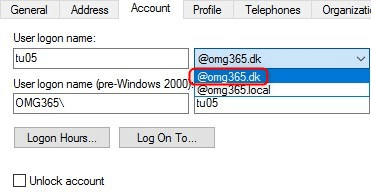
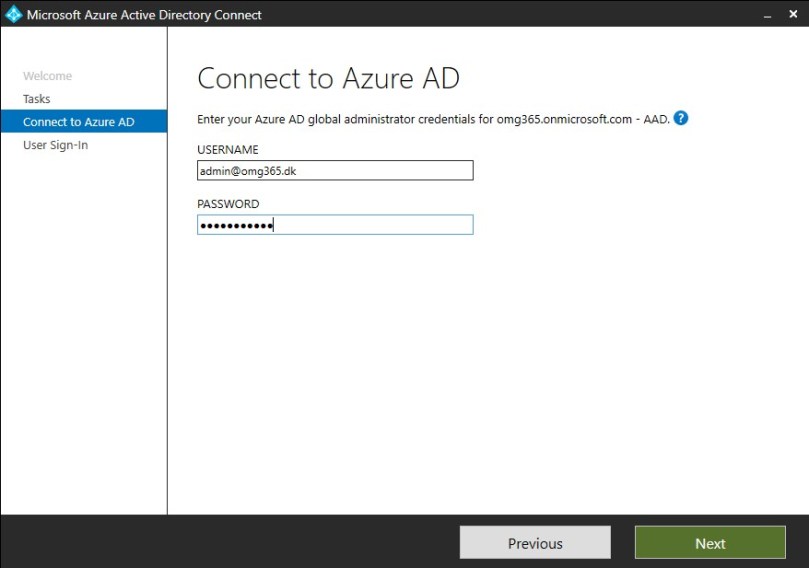
Choose “Change user sign-in”, and click next. Logon with your Office 365 Global Admin account

2019-10-08_11h19_55

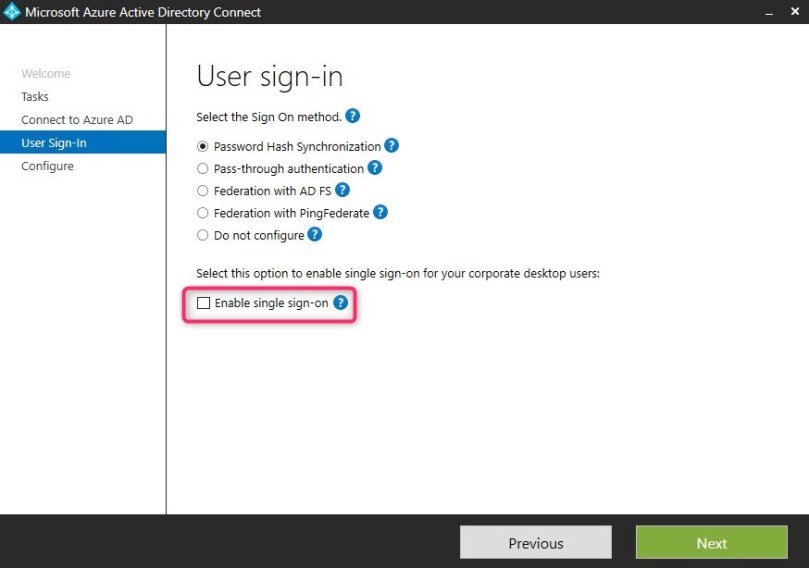
Remove the option for “Enable single sign-on” and click next
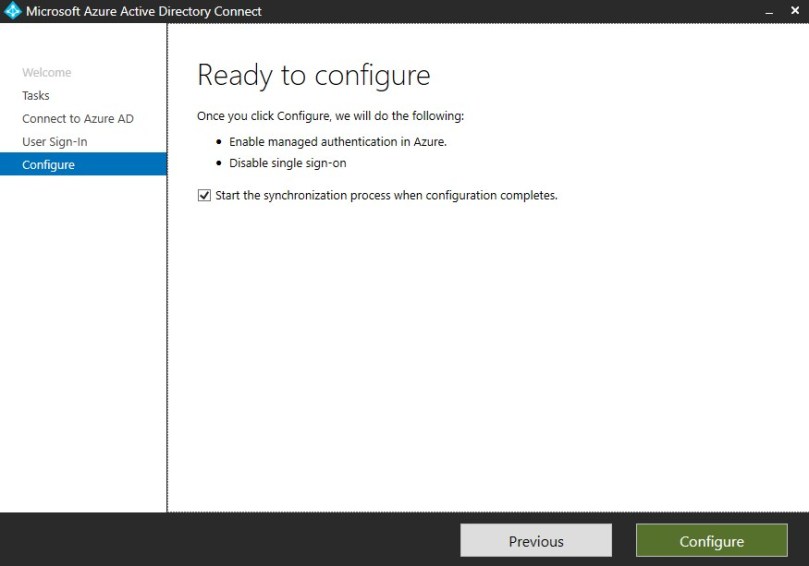
2019-10-08_11h21_48

And then, Configure

2019-10-08_11h23_46

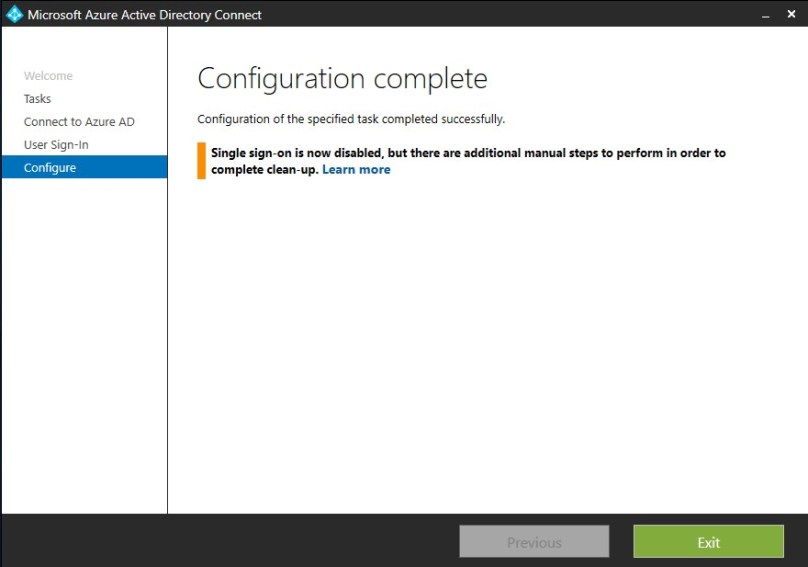
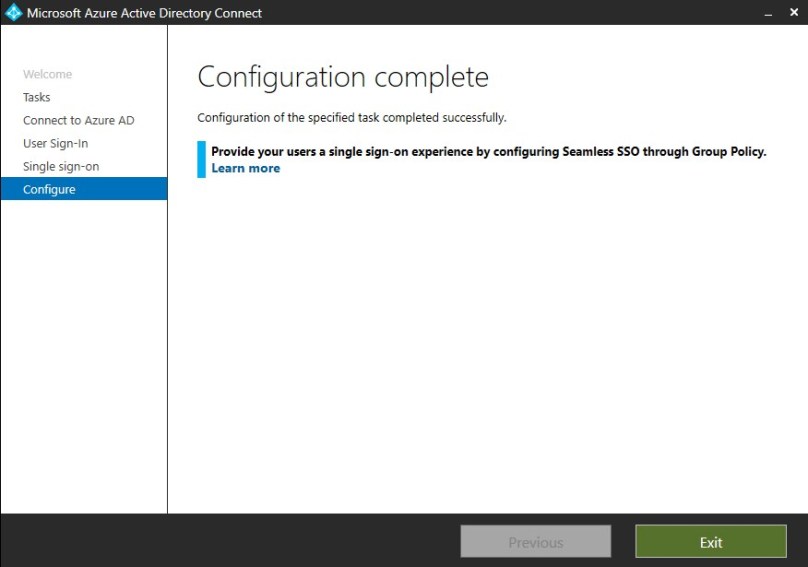
Now, if the next screenshot is what you get, you are got to gowlEmoticon-thumbsup.png. If it comes with a warning, saying something like “Single sign-on could not be disabled”, have no fear, it did for me when I did some test the first time. Run the wizard to the end, wait 5-10 min. and try again. You should end up with it being succesfully disabled.

2019-10-08_11h25_12

Status: For now, we have diabled SSO. Now we need to enable it again, because its an awesome feature and we really want it……

Run the Wizard again (As an admin), and make sure you set the tick (or what ever you call it) in “Enable single sign-on”

2019-10-08_11h30_35

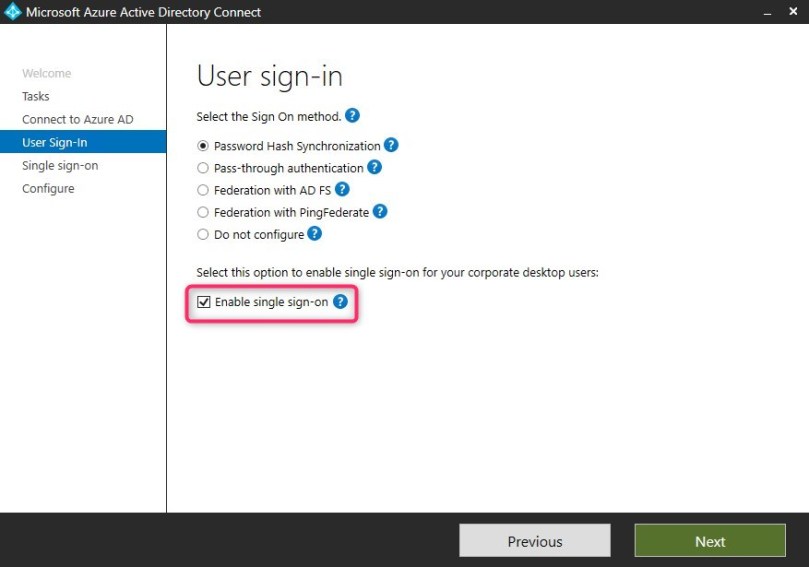
Click next – In the “Enter credentials” box, you need to provide your local Domain Admin

2019-10-08_11h32_22

Click OK, and next

2019-10-08_11h33_46

Click “Configure” and let the wizard do its magicwlEmoticon-confusedsmile.png

2019-10-08_11h34_41

Dont be alarmed, if it throws an error, it did for me a couple of times, just hit retry.

2019-10-08_11h38_26

Yay…success… and look, AZUREADSSOACC is back where it belongs in AD wlEmoticon-openmouthedsmile.png2019-10-08_11h39_57

Give it time to run a sync (or force one with PowerShell Start-ADSyncSyncCycle -PolicyType Delta ), but eventually it will sync back up, and work like it did before.

Happy Clouding wlEmoticon-smile.png

Advertisement

Seamless Sign On – How to and why

Seamless Sign On, what is it and why would you want to use it

Well, good questions. Seamless Sign On is a fairly new feature in Azure ADConnect, that allows users to have that “Single Sign On” experience, you get from using ADFS, but without the huge infrastructure. I can’t really see a lot of large companies using this feature, but for smaller / midsize businesses it makes a lot more sense. Why? Make it as easy for your users as possible, they would only need to remember 1 password, and you, as and admin, are in control of your users ID’s and passwords, from within your local AD (which in return will give you more time to enjoy your coffee)

So, lets get to it and start looking at the configuration. It doesn’t matter if you already have Azure ADConnect installed, or its a new installation. Its the same settings for both scenarios.

First of, start the AADConnect wizard. If you install AADConnect for the first time, the below is what you need to configure.

image

If you already have AADConnect running, this is what you need to configure.

image

On a side note, I would always recommend using OU filtering, so that you only synchronize what you need, and not all objects from AD. It will only look messy and confusing.

image

After configuration is done, you need a little more work on the client side. You need to set up GPO’s to allow Azure to receive the Kerberos tickets for Authentication before it works. So you need your browser to trust some sites.

Internet Explorer

For IE users (the few left smiley lol), you need to add some URL’s to the local intranet zone. Preferably done by GPO. These are the 2 addresses you need to add:

https://autologon.microsoftazuread-sso.com
https://aadg.windows.net.nsatc.net

Chrome

For Chrome users, there is a little more work, but it pays of. First of, download the Google ADMX files and add them to your AD, so that you are able to configure Chrome with GPO’s. Afterwards go to the Google Extension store. Search for “Windows 10 accounts”

clip_image002

Right click on the the logo and copy the link address.

clip_image004

Paste it to notepad

image

Copy the “app id”, from the last dash, to the questionmark, and paste it on a new line. Now you need to format the address for the Chrome GPO.

Separate the 32 character ID, with the default Google store address ;https://clients2.google.com/service/update2/crx, so that it looks like this

ppnbnpeolgkicgegkbkbjmhlideopiji;https://clients2.google.com/service/update2/crx

Find the correct Computer GPO setting for Chrome extensions

clip_image006

Open up “Configure the list of force-installed apps and extensions

Enable –> show, and paste the above ID address we created a few seconds ago

clip_image008

Save the GPO and link it to the OU where your computers are located, and you’re in business.

Once the GPO is “active” on clients (if it doesn’t happen run gpupdate /force, might require a restart) you will see the little Windows logo on the right topside of Chromeimage

Try and click on it smiley surprise, or just go to https://portal.office.com.

I have not tested it with other browsers. Edge browser isn’t supported, go figuresmiley disappointed

Pros and cons

I my opinion this as an awesome feature. Some of the smaller customers that I have helped, would definitely have benefited from this, instead of an ADFS infrastructure, but that’s just me smiley sunglasses. I will list my view on pros and cons here.

Pros

  • Users, need only to remember their AD password, and get easy access to your Office 365 tenant
  • Easy configuration, no need for expensive certificates, or a larger infrastructure as with ADFS
  • If browsers are configured correctly, the Seamless Sign On is as close to the Single Sign On, as you can get
  • The AADConnect / service is really stable. I have yet to see it crashing, or break down
  • Low footprint in your infrastructure. With installation on Domain Controllers being supported, or maybe your file server / application server, you don’t need dedicated HW / VM to run add extra costs


Cons

  • If the service is down, users can’t login. It’s possible to make the solution High available, but for that you will need one more local server to install an agent on
  • hmm… not sure I can find any more cons, but if i do, I’ll be sure to update smiley lol


Have fun, and enjoy.

UPN mismatch – ImmutableID fix – AADConnect gone wrong

In relation to my very first article, problems can occur. I had a question from a colleague, about a customer, who was using Office 365 and had a local AD. They where not using AADConnect, and would like to do so.

Challenge no.1, how to “match” the AD users with the Office 365 Cloud users? You can see more about how to do that in my first article here.

Matching up the users isn’t the biggest problem, the biggest problem is all the things that can go wrong, and you end up with sync problems, mails about UPN mismatch and so on.

I’ve come across this issue a few times before, and haven’t found one solution to the problem, but gathered information from 3-4 other articles and sites, mixed in a delicious cocktail of my own experience. That’s why I decided to write-up my own solution to the problem.

This is concerning the UPN mismatch, when an AD object has the same UPN and SMTP address as a cloud object. The mistake can happen for various reasons. The one reason I’ve seen the most, is when an AD object has been attempted synchronized, with the wrong UPN suffix (Office 365 will automatically give it the default UPN of user@tenant.onmicrosoft.com. Once you change the UPN to your public domain, locally and sync it, it will throw a UPN mismatch error in a mail to your admin account

error email


And also in the portal ☹

error portal

Once this has happened, you will need to do a little bit of work to get the accounts merged.

I assume you are familiar with signing in to Office 365 via Powershell, you’ll need it in a minute 😊, if not, I’ve included the few steps to get going.

You need to have the Office 365 Powershell module and the sign in client. You can download both here

This is the simple logon “script” I use. Logon with your Global Admin credentials to your tenant.

$O365Cred = Get-Credential

Import-Module MSOnline

Connect-MsolService –Credential $O365Cred

$O365Session = New-PSSession –ConfigurationName Microsoft.Exchange -ConnectionUri https://ps.outlook.com/powershell -Credential $O365Cred -Authentication Basic -AllowRedirection

Import-PSSession $O365Session


Next, import the Active Directory CMDLets

Import-Module ActiveDirectory


In my lab setup, I have AADConnect installed on a Domain Controller (This is now fully supported by Microsoft btw 😉)

Now, we are ready to go.

First of, if you have set up your AADConnect with OU filtering, your fine, if not, create a new OU, that is NOT synced with your tenant.

  1. Move the user you are having trouble with, to an OU that is not synced. In my case the user is Test User 5 (tu05)
  2. Force a sync
    • Start-ADSyncSyncCycle -PolicyType Delta
  3. Your synced user should now be in the deleted folder in Office 365. You need to delete it from the recycle bin.
    • Remove-MsolUser -UserPrincipalName tu05@omg365.onmicrosoft.com -RemoveFromRecycleBin

deleted user

Next, we need to run a series of Powershell cmdlets, to extract the ObjectGUID from the AD user and change the ImmutableID of Office 365 user with the result.

  1. First of, we need to change the UPN of the cloud user, from tu05@omg365.dk to the tenant domain tu05@omg365.onmicrosoft.com, if you don’t do this, you’ll receive an error, later on, when changing the ImmutableID.
    • Set-MsolUserPrincipalName -UserPrincipalName tu05@omg365.dk -NewUserPrincipalName tu05@omg365.onmicrosoft.com


  1. Next, we need to find the ObjectGUID of the AD user, convert it to an ImmutableID, and assign that ID to the Cloud user.
    • $ADUser = “tu05
    • $365User = “tu05@omg365.onmicrosoft.com
    • $guid =(Get-ADUser $ADUser).Objectguid
    • $immutableID=[convert]::ToBase64String($guid.tobytearray())
    • Set-MsolUser -UserPrincipalName “$365User” -ImmutableId $immutableID
  2. Before syncing up, you’ll need to change back the UPN of the cloud object, otherwise, you’ll be in the same problem state as before, but reversed 😉
    • Set-MsolUserPrincipalName -UserPrincipalName tu05@omg365.onmicrosoft.com -NewUserPrincipalName tu05@omg365.dk

So now, we have ”prepared” Office 365 to Hard Match the AD user with the Cloud user, but before we do so, we need to change a few things on the AD user.

Start of by locating the user in the OU that is not synced with O365

  1. Make sure the E-mail is correct on the “General” fan of the user
    • ad user
    • Next, go to “Account” and change the UPN, change it to your public / e-mail domain name
    • upn
    • Lastly, move the user to the original OU, and force a sync (or wait for the magic to happen, New default sync is 30 min.)
    • Start-ADSyncSyncCycle -PolicyType Delta

Be patient, it can take a while for the change to show up.

Before synchronizing

in_cloud

Voila, After synchronizing

synced

Your AD user and your Cloud user have been merged, and everybody is happy 😊

Merging local AD users with Cloud users


Office 365 is no ”new kid on the block” anymore, and most companies are running with AADConnect, with or without ADFS. But I still see smaller customers, who have a local AD and an Exchange Online tenant, without any connection. It rarely takes a lot of time to convince them, that managing 2 user accounts, is a lot more work, and usually they are REALLY tired of changing the online password, because users forget! Or perhaps, even worse…. They set the passwords to never expire 2018-02-06_15h55_49

So, is there an easy way to “merge” the two? Yes, but you need to plan it well, and have all the settings of your users correct.

I’ll describe it in the following steps.

I already installed AADConnect, and made sure to use OU filtering, meaning, that I only synchronize certain OU’s to Office 365. In my case, the “Users” OU is synced. The OU “Not synced”, is were my users that I want to sync are located.

AD_OU

In my Office 365 tenant, I have my 3 cloud users (I’m aware that one of them is missing a license, but that doesn’t really matter 😊)cloud users

  1. So, first step is to makes sure that the local users have the correct settings Make sure, that their correct email address is in the “E-mail” fieldAD_user
  2. Next, choose the “Account” tab, and make sure that the users UPN matches your public mail domain added in Office 365correct UPN
  3. If you have a “local” domain (in the old days, it was fairly normal that the AD domain was .local .lan or something not internet routable.) You need to add your SMTP domain as an UPN suffix. Open “Active Directory Domains and Trusts”, takes properties and add the domain.

add upn to adadd upn to ad1

Make sure you make that change to all your users. 😮

  1. Now were ready to start merging users. You might want to test with a made-up user first, but otherwise its just start moving users to the synced OU and run AAD Sync.
    • To force a synchronization you need Powershell, otherwise you have to wait up to 30 min (default sync time)
    • Logon on to your Office 365 tenant with Global Admin rights. Then run the following command
    • Start-ADSyncSyncCycle -PolicyType Delta


Wow and behold. Users who, before the change had 2 passwords and 2 user accounts to maintain, can now benefit from all the features of AADConnect 😊

cloud synced users